A team in CallAIder combines integration, operators, analytics rules, and optional call properties. The team defines which dialogs are imported and how they are analyzed.
This guide shows the full team-creation flow using Custom Telephony as an example.
If your custom integration is not connected yet, start here first: Custom Telephony Integration in CallAIder: full guide.
Prerequisites
Before creating a team, make sure:
- integration is connected and active;
- at least one analytics rule exists;
- operators are available (fetched from integration or added manually).
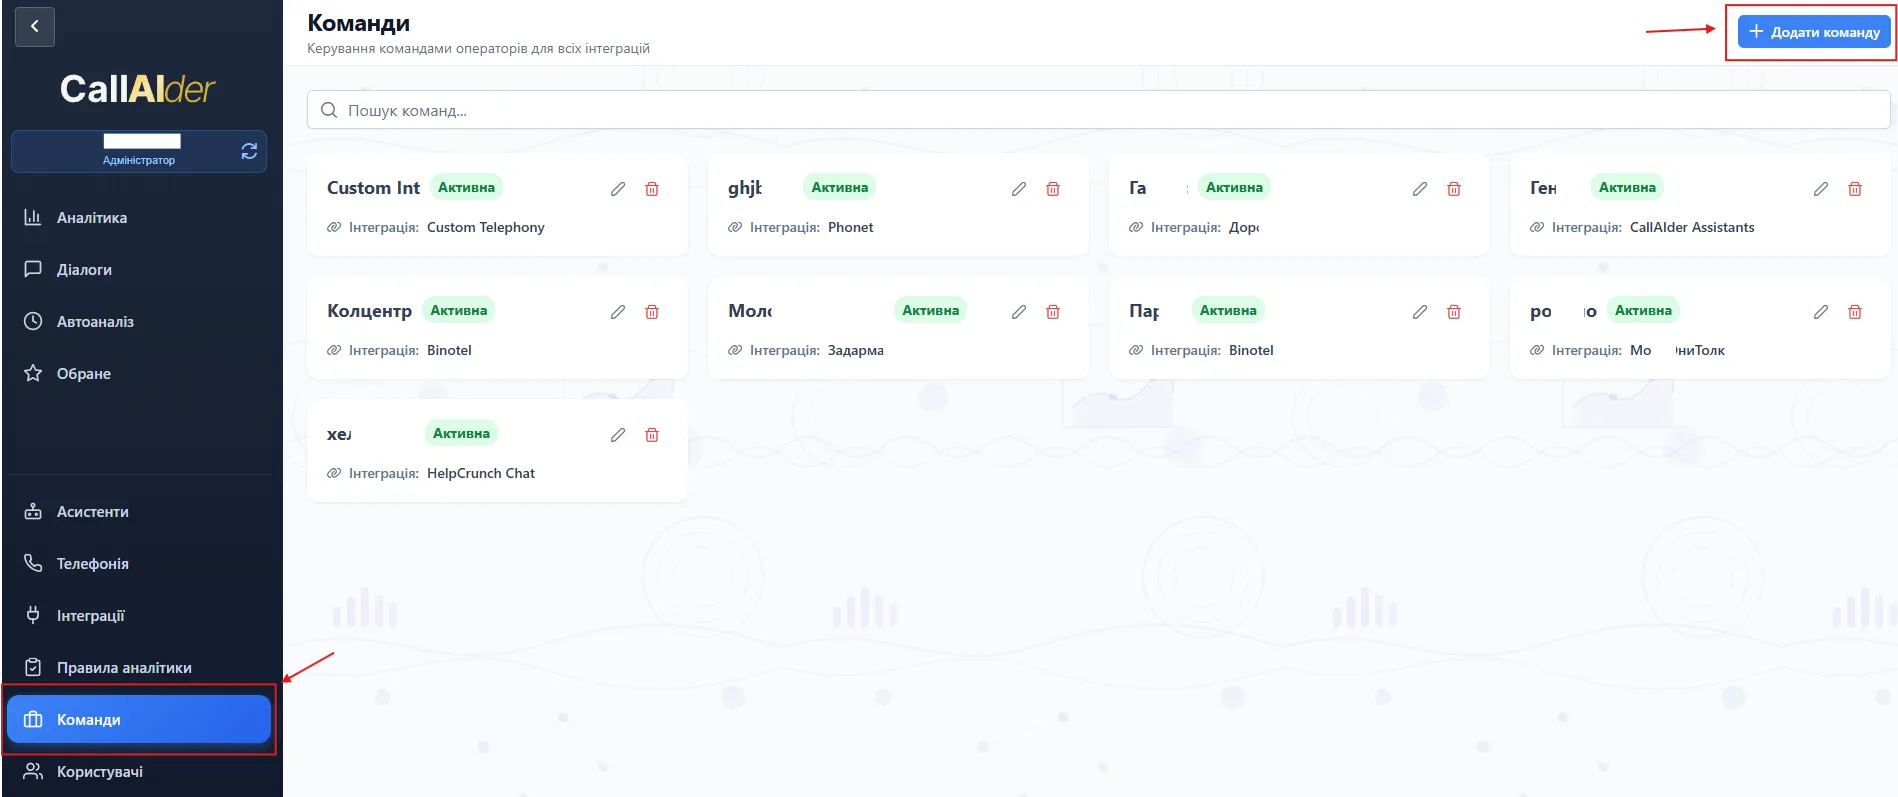
Step 1. Open Teams section
- In the left menu, open Teams.
- Click Add team.
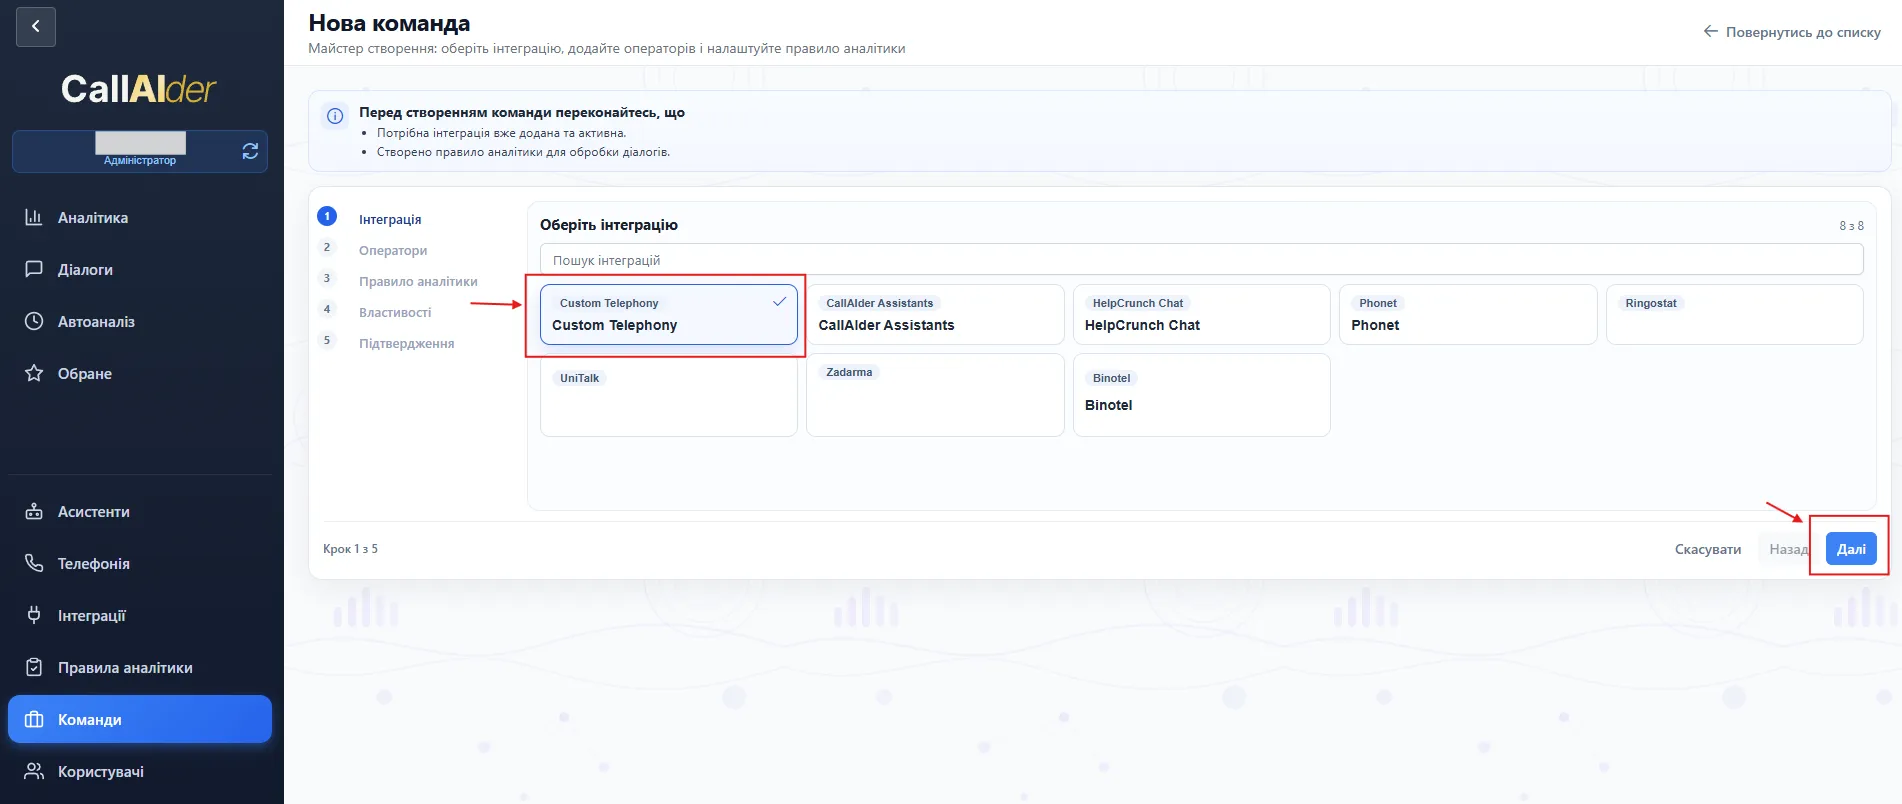
Step 2. Select integration
In the wizard on the Integration step:
- select the required integration (for example,
Custom Telephony); - click Next.
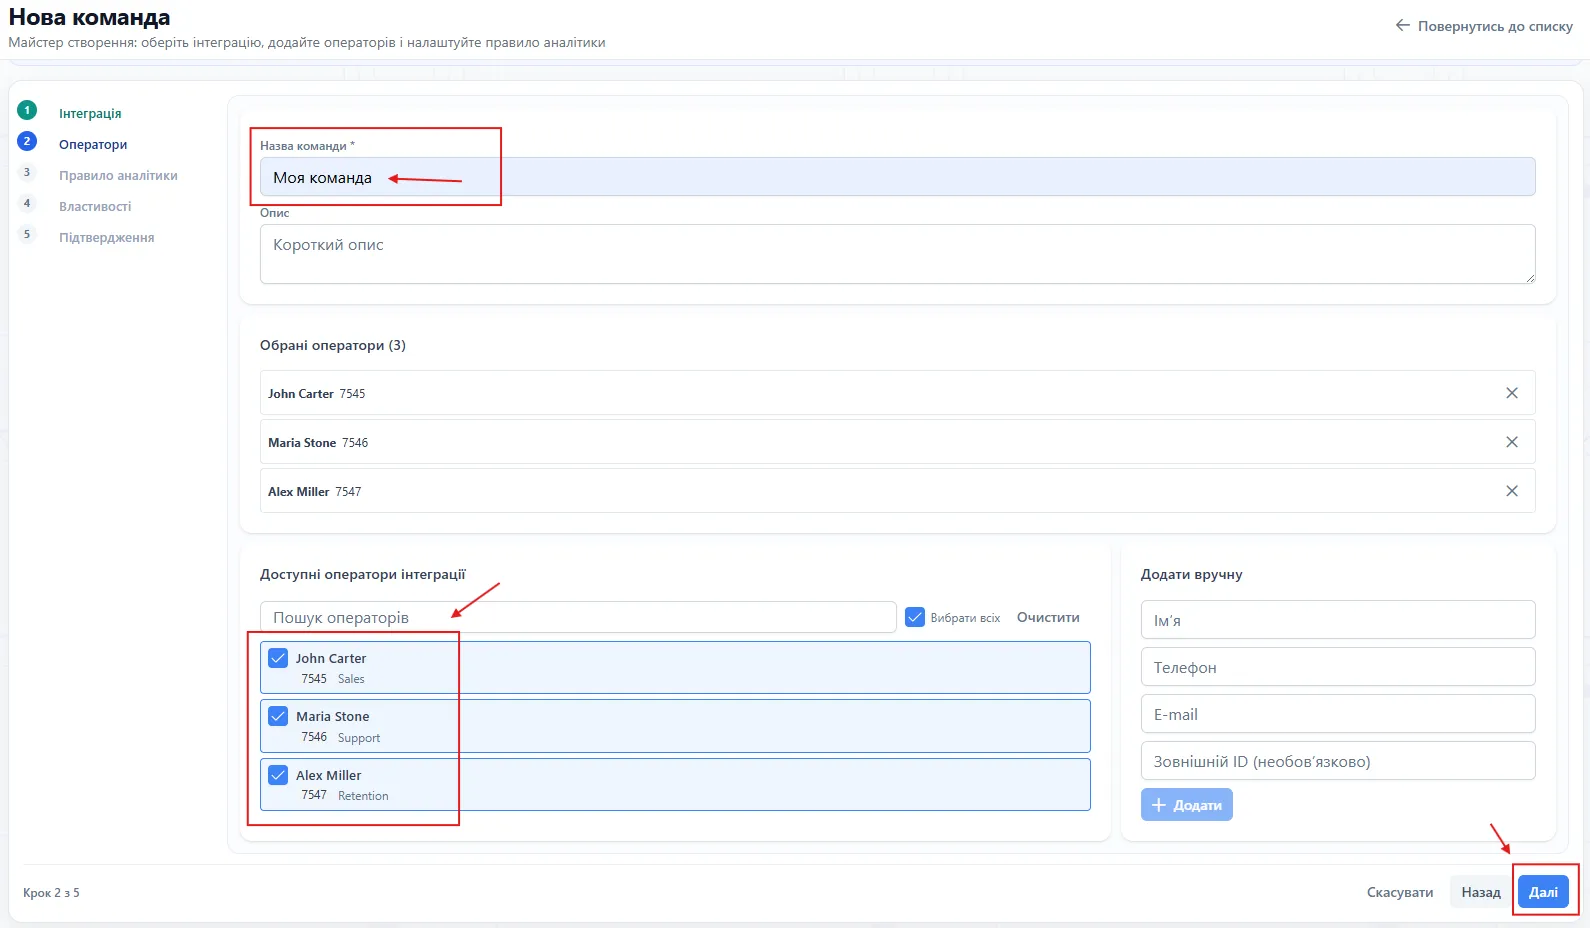
Step 3. Add operators and team name
On the Operators step:
- fill in Team name (required);
- add description if needed;
- select operators from available list;
- optionally add operators manually;
- click Next.
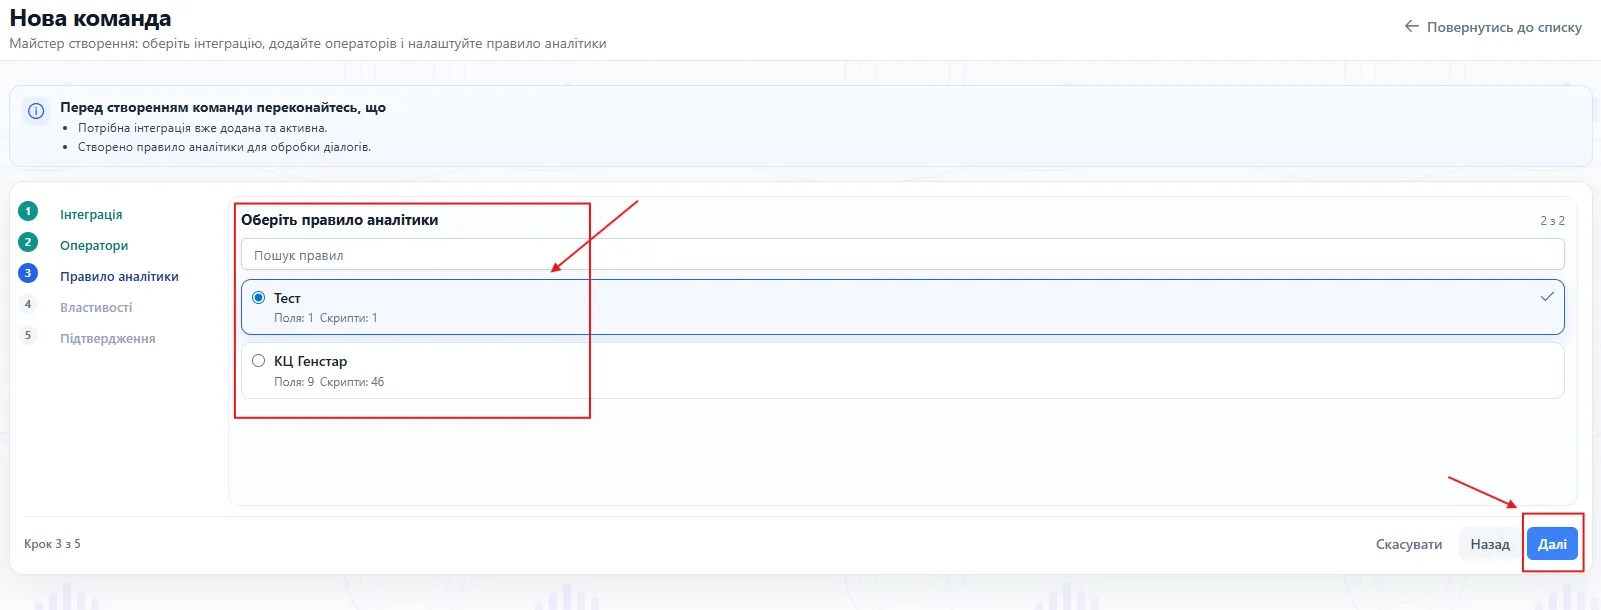
Step 4. Select analytics rule
On the Analytics rule step:
- choose the rule to evaluate dialogs;
- verify fields/scripts count in the selected rule;
- click Next.
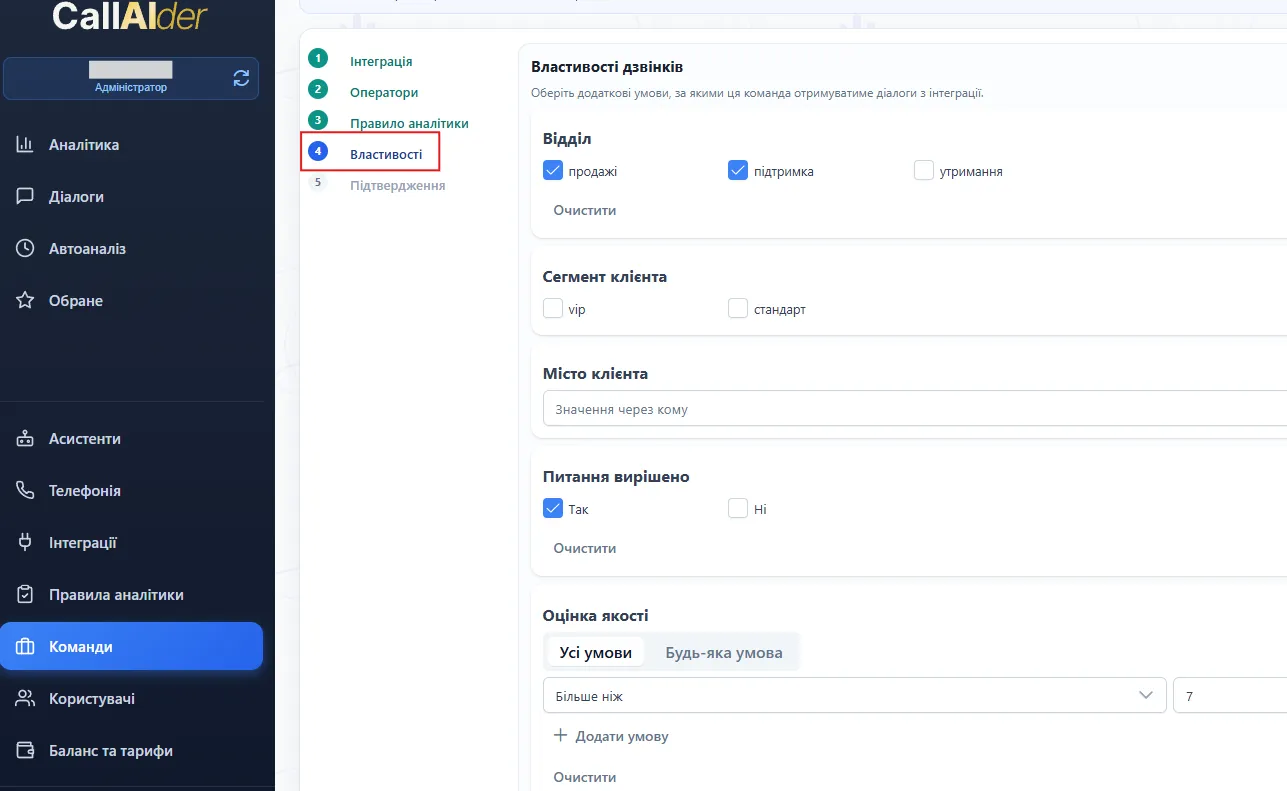
Step 5. Configure call properties (optional)
The Properties step appears when integration provides additional call properties (for Custom Telephony, this is typically enabled via /properties/schema).
Here you can constrain imported dialogs by additional criteria such as:
- department;
- client segment;
- client city;
- boolean flags (for example, issue resolved);
- numeric conditions (for example, quality score range with all/any mode).
Important clarification:
/properties/schemais optional and mainly used for flexible import setup in the wizard;- if schema is missing, integration can still work, but this step may be hidden or limited;
- additional properties are also used later in Dialogs filters.
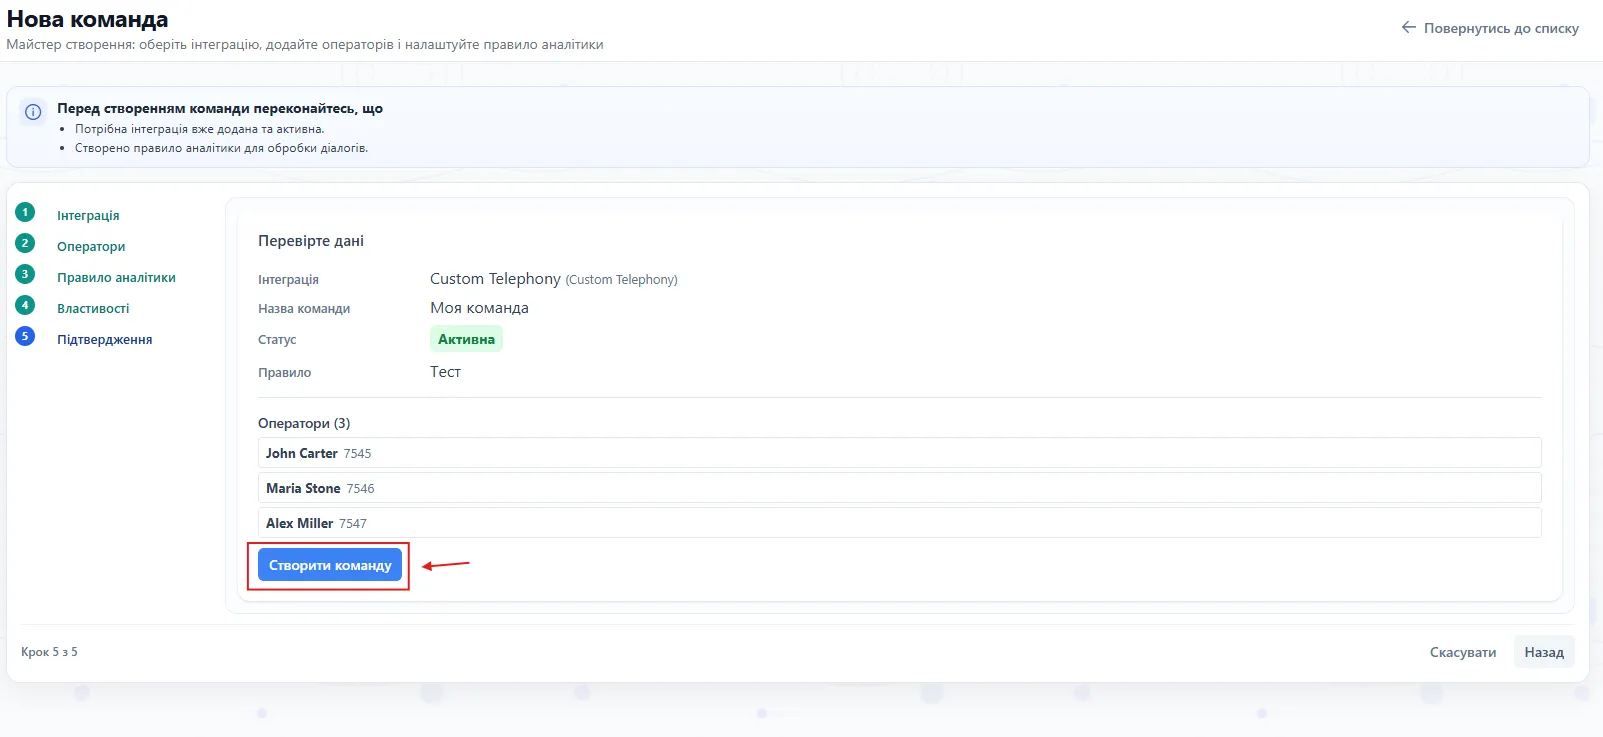
Step 6. Review and create team
On the Confirmation step, verify:
- selected integration;
- team name;
- status;
- analytics rule;
- selected operators.
Then click Create team.
What to do after team creation
- Open Dialogs.
- Confirm that new calls are being imported.
- Use filters if you need narrower call subsets.
Best practices
- Use clear team names (for example,
Support UA,Sales B2B,VIP Outbound). - Keep teams scoped by workflow (do not mix very different operator scenarios).
- Use separate analytics rules per department.
- Periodically verify operator list consistency in integration.
Common issues
Cannot proceed from Operators step
Usually caused by:
- missing team name;
- no selected operators.
Properties step is missing
Most common reasons:
/properties/schemais not implemented;- endpoint returns empty
properties.
Team is created but dialogs are missing
Check:
- import time range;
- property filter strictness;
- whether integration returns completed calls with valid
operatorId.
Additional filters do not work as expected
Check:
- schema keys match
calls[].propertieskeys exactly; - property values use expected primitive types;
- your backend includes
propertiesin call payload when additional filtering is needed.
After these checks, the team is ready for stable operation in the standard CallAIder workflow.